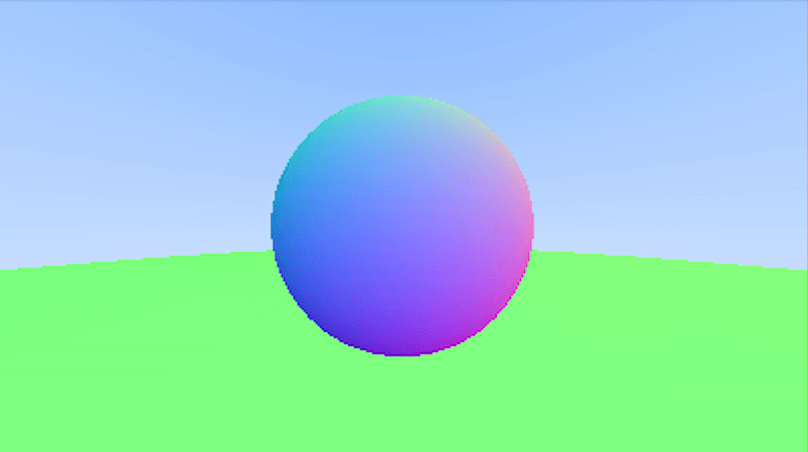
这一节的内容修改的比较多,我们会把前面的逻辑重新整理一下,将可光线可交互的世界物体,抽象成一个 Hittable Object,然后可以在场景中添加多个物体。也使用了 Rust 的 Trait,Vec 等。最终效果图如下
在代码抽象之前,有一个东西需要说明一下。对于一个球体来说,当光线从球体外部,向球体发射时,球体的法线是从球面向外的。但是,如果光线是从球内发射,我们要看球内的东西,这时,法线的方向就应该是反向的,也就是从球面指向球心。
首先抽象光线打到一个点,对于光线来说,它不关心打到了什么物体,它只关心,打到了哪个点,这个点的法线是什么等,所以,我们可以使用一个结构体,来记录打到这件事情。
新建一个文件,名为 hittable.rs,代码如下。这里我们使用了Rust的Trait,后面,所有可以与光线交互的物体,都要实现这个Trait。
在判断一个点的法线朝向时,我们使用了向量的点乘,如果光线的方向,与一个物体的外法线方向相反,则说明光线是从物体外面射向物体的,而如果方向相同,则说明是从物体的内部,射向物体表面的。
如果两个向量点乘的值 > 0,则方向基本相同,夹角在 0~90 度之间 如果两个向量点乘的值 = 0,则正交,相互垂直 如果两个向量点乘的值 < 0,则方向基本相反,夹角在 90~180 度之间
// src/hittable.rs
use crate::ray::Ray;
use crate::vec3::Vec3;

#[derive(Debug, Copy, Clone)]
pub struct HitRecord {
    pub p: Vec3,
    pub normal: Vec3,
    pub t: f64,
    pub front_face: bool,   // 这里的 front_face 变量去掉也可以,并没有什么用
}

impl HitRecord {
    pub fn new(p: Vec3, t: f64, outward_normal: Vec3, r: Ray) -> Self {
        let front_face = Vec3::dot(r.direction, outward_normal) < 0.0;
        let normal = if front_face {
            outward_normal
        } else {
            -outward_normal
        };

        Self {
            p,
            normal,
            t,
            front_face,
        }
    }
}

pub trait Hittable {
    fn hit(&self, r: Ray, t_min: f64, t_max: f64) -> Option<HitRecord>;
}
接下来就是将球体抽象成一个结构体,然后为其实现 Hittable Trait。新建一个名为 sphere.rs 的文件,代码如下
// src/sphere.rs
use crate::hittable::{HitRecord, Hittable};
use crate::ray::Ray;
use crate::vec3::Vec3;

pub struct Sphere {
    pub center: Vec3,
    pub radius: f64,
}

impl Sphere {
    pub fn new(cen: Vec3, r: f64) -> Self {
        Self {
            center: cen,
            radius: r,
        }
    }
}

impl Hittable for Sphere {
    fn hit(&self, r: Ray, t_min: f64, t_max: f64) -> Option<HitRecord> {
        let oc = r.origin - self.center;
        let a = r.direction.length_squared();
        let half_b = Vec3::dot(oc, r.direction);
        let c = oc.length_squared() - self.radius * self.radius;
        let result = half_b * half_b - a * c;
        if result < 0.0 {
            return None;
        }

        let sqrtd = result.sqrt();

        // 找到光线打到球面最近的点,有可能光线会穿透球体,与两个点相交,
        // 但是远的点会被近的面遮住,我们看不到,所以这里使用近的点就可以了
        let mut root = (-half_b - sqrtd) / a;
        if root < t_min || t_max < root {
            root = (-half_b + sqrtd) / a;
            if root < t_min || t_max < root {
                return None;
            }
        }

        let t = root;
        let p = r.at(t);
        let outward_normal = (p - self.center) / self.radius;

        let hit_rec = HitRecord::new(p, t, outward_normal, r);
        return Some(hit_rec);
    }
}
如果我们要在场景中添加多个可与射线交互的物体呢?所以再创建一个可交互物体的列表,名为 HittableList。新建一个名为 hittable_list.rs 的文件,代码如下。HittableList 也是实现了 Hittable Trait,它相当于一个 Hittable 的容器,在与光线交互时,会遍历其下的所有物体。
// src/hittable_list.rs
use crate::hittable::{HitRecord, Hittable};
use crate::ray::Ray;

use std::vec::Vec;

pub struct HittableList {
    pub hittable_list: Vec<Box<dyn Hittable>>,
}

impl HittableList {
    pub fn new() -> Self {
        Self {
            hittable_list: Vec::new(),
        }
    }

    pub fn add(&mut self, object: Box<dyn Hittable>) {
        self.hittable_list.push(object);
    }

    pub fn clear(&mut self) {
        self.hittable_list.clear();
    }
}

impl Hittable for HittableList {
    fn hit(&self, r: Ray, t_min: f64, t_max: f64) -> Option<HitRecord> {
        let mut result_hit_rec: Option<HitRecord> = None;
        let mut closet_so_far = t_max;

        for obj in self.hittable_list.iter() {
            if let Some(hit_rec) = obj.hit(r, t_min, closet_so_far) {
                closet_so_far = hit_rec.t;
                result_hit_rec = Some(hit_rec);
            }
        }

        return result_hit_rec;
    }
}
接下来就是修改 main.rs了,首先是 main 函数中我们创建一个 HittableList,向其添加两个球体,一个是原来的,另一个大一点,作为地面。然后修改 ray_color 函数,参数变为光线和可交互的物体,这里传的就是一个 HittableList。
// src/main.rs
#![allow(dead_code)]
mod hittable;
mod hittable_list;
mod ray;
mod sphere;
mod vec3;
use hittable::Hittable;
use hittable_list::HittableList;
use ray::Ray;
use sphere::Sphere;
use vec3::{Color, Vec3};

fn ray_color(r: Ray, world: &dyn Hittable) -> Color {
    if let Some(hit_record) = world.hit(r, 0.0, f64::INFINITY) {
        return 0.5 * (hit_record.normal + Color::one());
    }

    let unit_direction = Vec3::unit_vector(r.direction);
    let t = 0.5 * (unit_direction.y + 1.0);
    return (1.0 - t) * Color::one() + t * Color::new(0.5, 0.7, 1.0);
}

fn main() {
    // Image config
    const ASPECT_RATIO: f64 = 16.0 / 9.0;
    const IMAGE_WIDTH: u64 = 400;
    const IMAGE_HEIGHT: u64 = ((IMAGE_WIDTH as f64) / ASPECT_RATIO) as u64;

    // World
    let mut world = HittableList::new();
    world.add(Box::new(Sphere::new(Vec3::new(0.0, 0.0, -1.0), 0.5)));
    world.add(Box::new(Sphere::new(Vec3::new(0.0, -100.5, -1.0), 100.0)));

    // Camera config
    let viewport_height = 2.0;
    let viewport_width = ASPECT_RATIO * viewport_height;
    let focal_length = 1.0;

    let origin = Vec3::zero();
    let horizontal = Vec3::new(viewport_width, 0.0, 0.0);
    let vertical = Vec3::new(0.0, viewport_height, 0.0);
    let lower_left_corner =
        origin - horizontal / 2.0 - vertical / 2.0 - Vec3::new(0.0, 0.0, focal_length);

    // Render
    println!("{}", format!("P3\n{} {}\n255\n", IMAGE_WIDTH, IMAGE_HEIGHT));
    for j in (0..=IMAGE_HEIGHT - 1).rev() {
        for i in 0..IMAGE_WIDTH {
            let u = i as f64 / (IMAGE_WIDTH - 1) as f64;
            let v = j as f64 / (IMAGE_HEIGHT - 1) as f64;
            let direction = lower_left_corner + u * horizontal + v * vertical - origin;
            let r = Ray::new(origin, direction);
            let pixel_color = ray_color(r, &world);
            println!("{}", pixel_color.get_color_string());
        }
    }
}
这里第二个球体,也就是我们当作地面的,是绿色的,这是因为对于它来说,光线就是从球内射向球面的,我们设定它的半径为100,已经将光线发射点包在其内了。
以上就是这节的全部内容,cargo run > world.ppm 运行。