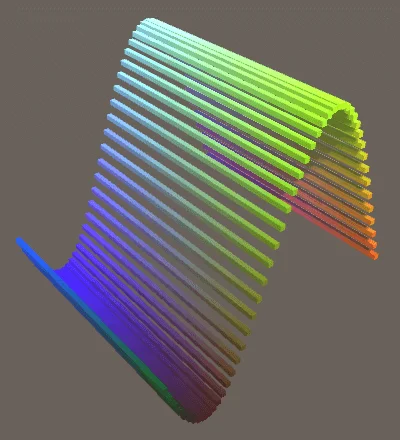
这篇博客是上一篇 使用Unity3D展示Sin函数动画 的续篇,在上一篇的基础上,来实现更复杂的效果。在文章最后会有完整的 C# 代码和 Shader 代码,先来看一下最终的效果图
由于篇幅太长,所以将分为上下两部分,现在开始第一部分的内容。
先将上一节 使用Unity3D展示Sin函数动画 的资源准备好,可以按下面的步骤手动建立,也可以直接导入上一节内容的完整 Unity 资源包,点这里下载
- 使用Unity的Cube做成一个Prefab
- 新建一个 Shader,命名为 ColoredPoint,Shader 的代码为上一篇博客的 Shader
- 新建一个材质,命名为 ColoredPoint,并使用第2步中创建的Shader
- C# 逻辑代码,也使用上一篇博客中的完整代码,在本文中会有很多修改
接下来,我们开始新的内容。
1 在不同的效果函数之间切换
在上一篇博客中我们实现了Sine函数的展示,现在要加入更多函数的展示,为了方便在运行状态可以随时切换到其他函数,我们需要把每一种类型的展示放在独立的函数中。
1.1 将 Sine 函数的表示放在独立函数中
首先在 Graph 脚本中添加一个新的函数 float SineFunction(float x, float t) {},这个函数将用于展示 $f(x,t) = sin(π(x + t))$。然后我们需要将函数体的内容填写进去,代码如下
float SineFunction(float x, float t) {
    Mathf.Sin(Mathf.PI * (x + t));
}
然后把 Update 函数里的代码改为调用我们新添加的函数
void Update () {
    for (int i = 0; i < points.Length; i++) {
        Transform point = points[i];
        Vector3 position = point.localPosition;
        //position.y = Mathf.Sin(Mathf.PI * (position.x + Time.time));
        position.y = SineFunction(position.x, Time.time);
        point.localPosition = position;
    }
}
注意 Time.time 在每一次循环中是一样的,所以我们这把个抽理出来。
void Update () {
    float t = Time.time;
    for (int i = 0; i < points.Length; i++) {
        Transform point = points[i];
        Vector3 position = point.localPosition;
        position.y = SineFunction(position.x, t);
        point.localPosition = position;
    }
}
1.2 添加第二个展示函数
现在我们来添加第二个展示函数 MultiSineFunction,稍微复杂那么一点点。
float MultiSineFunction(float x, float t)
{
    float y = Mathf.Sin(Mathf.PI * (x + t));
    y += Mathf.Sin(2f * Mathf.PI * (x + t)) / 2f;
    y *= 2f / 3f;
    return y;
}
上面代码中表示的数学公式是
$$f(x,t) = (sin(π(x + t)) + \frac{sin(2π(x + t))}{2}) \frac{2}{3}$$
和代码一起看,就很容易看懂,首先是一个随着时间变化的 sin,然后结果加上一个2倍的 sin。除以2是因为太快了,我们减少一半。最后一句之所有乘 2/3 是因为前两句代码算出来的 y 的结果最大值最小值是 [-1.5, 1.5],我们要将 y 限制在 [-1, 1] 之间,所以才乘上 2/3,和除以 1.5 结果是一样的。
接下来看Update中的调用函数改为调用 MultiSineFunction,运行后,结果如下
上面的代码中,运行结果可以看到一个小的 Sine 函数跟随一个大的 Sine 函数。
下面我们再修改一下代码,让小的 Sine 函数沿着较大的 Sine 函数路径运行。
float MultiSineFunction(float x, float t)
{
    float y = Mathf.Sin(Mathf.PI * (x + t));
    y += Mathf.Sin(2f * Mathf.PI * (x + 2f * t)) / 2f;
    y *= 2f / 3f;
    return y;
}
下面是运行结果
1.3 在编辑中选择函数
来回改代码切换表现函数不太好,所以我们添加一个变量,来控制当前使用哪一个表现函数。
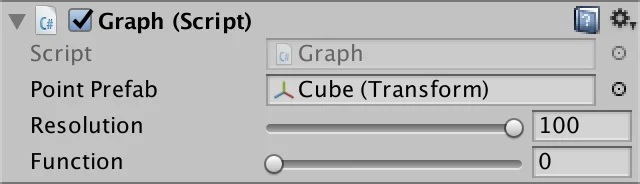
[Range(0, 1)]
public int function;
添加上面的代码后,就可以在编辑器看到变量
修改 Update 函数,使用 function 变量决定调用哪个表现函数
void Update()
{
    float t = Time.time;
    for (int i = 0; i < points.Length; i++)
    {
        Transform point = points[i];
        Vector3 position = point.localPosition;
        if (function == 0)
        {
            position.y = SineFunction(position.x, t);
        }
        else
        {
            position.y = MultiSineFunction(position.x, t);
        }
        point.localPosition = position;
    }
}
现在就可以在运行模式下,通过改变 function 的值,查看不同的函数展示效果了。
1.4 静态函数
虽然 SineFunction 和 MultiSineFunction 都是 Graph 的一部分,但其实这两个函数并不依赖于 Graph,所以可以把这两个函数做成静态的,或者放到其他文件中,都是可以的,而 Graph 只是用这两个函数。
public static float SineFunction(float x, float t)
{
    return Mathf.Sin(Mathf.PI * (x + t));
}

public static float MultiSineFunction(float x, float t)
{
    float y = Mathf.Sin(Mathf.PI * (x + t));
    y += Mathf.Sin(2f * Mathf.PI * (x + 2f * t)) / 2f;
    y *= 2f / 3f;
    return y;
}
改成 static 后,就可以在任何一个文件直接使用 Graph.SineFunction() 这样的形式去调用函数,就像 Mathf.Sin() 函数一样。
1.5 Delegates
使用 if-else 来控制操作哪个函数不是很好,特别是函数更多的情况下,所以我们优化一下代码,使用C#的委托来做这件事情。
首先我们来创建一个新的脚本,名为 GraphFunction,在里面定义委托类型,完整代码如下
using UnityEngine;

public delegate float GraphFunction(float x, float t);
将新建的脚本里原来自动生成的代码全部删除掉,只保留上面两行就行。委托其实就像是一个函数指针,可以指向某种类型的函数。
接下来我们修改 Update 函数,进行第一次优化,修改后的代码如下
void Update()
{
    float t = Time.time;
    GraphFunction f;

    if(function == 0)
    {
        f = SineFunction;
    }
    else
    {
        f = MultiSineFunction;
    }
    for (int i = 0; i < points.Length; i++)
    {
        Transform point = points[i];
        Vector3 position = point.localPosition;
        position.y = f(position.x, t);
        point.localPosition = position;
    }
}
上面的代码把 if-else 拿到了 for 循环的外面,通过 function 变量来设置当前指向哪个函数。看起来并没有解决本质问题,if-else 依然存在。不要着急,接着往下看。
1.6 使用 Delegate 数组
现在我们就要把 if-else 从代码中去掉。而方法是定义一个 Delegate 数组,用于存放所有的展示函数,然后使用 function 变量值作为所引,访问指定的函数。
第一步,先在 Graph 中添加下面的代码,将函数存在 Delegate 数组中。
static GraphFunction[] functions =
{
    SineFunction, MultiSineFunction
};
因为这个也和 Graph 脚本关系不大,没什么依赖,所以我们也写成 static 静态的形式。
接着,再次修改 Update 函数如下,去掉了 if-else 代码,直接使用 function 作为所引。
void Update()
{
    float t = Time.time;
    GraphFunction f = functions[function];

    for (int i = 0; i < points.Length; i++)
    {
        Transform point = points[i];
        Vector3 position = point.localPosition;
        position.y = f(position.x, t);
        point.localPosition = position;
    }
}
但这样还会有问题,那就是很不直观,谁知道 function 变量 0 是代表哪个函数,1 又是代表哪个函数,所以接下来我们就要解决这个问题。
1.7 使用枚举
定义一个枚举,枚举的每一个值,与 Delegate 数组中的函数一一对应,这样就可以很清晰地知道当前选择的是什么函数。
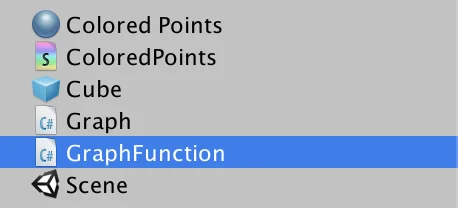
我们创建一个新的脚本文件,名为 GraphFunctionName,然后删除自动生成的代码,将下面的代码复制进去
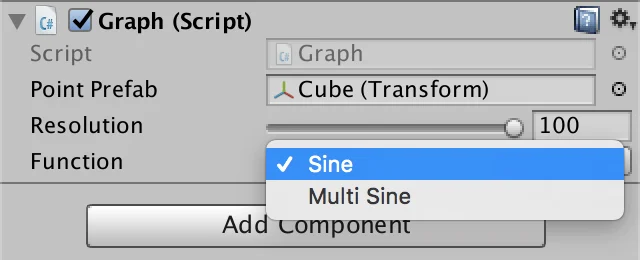
public enum GraphFunctionName
{
    Sine,
    MultiSine,
}
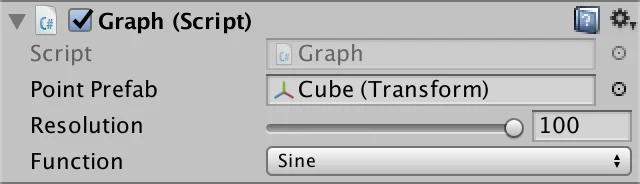
接下来,我们修改 function 变量的类型,不在使用 int 型,改为使用 GraphFunctionName 枚举类型
//[Range(0, 1)]
//public int function;
public GraphFunctionName function;
然后在 Update 中就可以使用枚举强制转成 int 作为索引,去访问函数,修改后的 Update 代码如下
void Update()
{
    float t = Time.time;
    GraphFunction f = functions[(int)function];

    for (int i = 0; i < points.Length; i++)
    {
        Transform point = points[i];
        Vector3 position = point.localPosition;
        position.y = f(position.x, t);
        point.localPosition = position;
    }
}
现在就可以在编辑器中通过选择枚举来查看指定的数学函数展示了
运行一下看效果,到此为止还不错,接下来我们继续(哭笑表情)。在继续之前,先把目前的完整 Graph 代码贴出来
using UnityEngine;

public class Graph : MonoBehaviour
{
    public Transform pointPrefab;

    [Range(10, 100)]
    public int resolution = 10;

    public GraphFunctionName function;

    Transform[] points;

    static GraphFunction[] functions =
    {
        SineFunction, MultiSineFunction
    };

    void Awake()
    {
        float step = 2f / resolution;
        Vector3 scale = Vector3.one * step;
        Vector3 position;
        position.y = 0f;
        position.z = 0f;
        points = new Transform[resolution];
        for (int i = 0; i < points.Length; i++)
        {
            Transform point = Instantiate(pointPrefab);
            position.x = (i + 0.5f) * step - 1f;
            point.localPosition = position;
            point.localScale = scale;
            point.SetParent(transform, false);
            points[i] = point;
        }
    }

    void Update()
    {
        float t = Time.time;
        GraphFunction f = functions[(int)function];

        for (int i = 0; i < points.Length; i++)
        {
            Transform point = points[i];
            Vector3 position = point.localPosition;
            position.y = f(position.x, t);
            point.localPosition = position;
        }
    }

    public static float SineFunction(float x, float t)
    {
        return Mathf.Sin(Mathf.PI * (x + t));
    }

    public static float MultiSineFunction(float x, float t)
    {
        float y = Mathf.Sin(Mathf.PI * (x + t));
        y += Mathf.Sin(2f * Mathf.PI * (x + 2f * t)) / 2f;
        y *= 2f / 3f;
        return y;
    }
}
2 增加一个维度
在此之前,我们只是用一个维度作为输入,影响另一个输出,也就是使用 x 值作为输入,影响 y 值。现在我们要增加一个维度,z 轴的值,也就是使用 x 和 z 作为输入,输出还是 y 值。也就是我们从点,现在要过度到面。
首先修改 Shader,使用 z 值控制颜色的蓝色通道。只需要修改一句,将 Albedo 赋值改为下面的代码
o.Albedo.rgb = IN.worldPos.xyz * 0.5 + 0.5;
2.1 修改函数,添加 z 轴参数
首先将 GraphFunction 的 Delegate 添加上 z 参数
public delegate float GraphFunction (float x, float z, float t);
然后将当前的两个展示函数,SinFunction 和 MultiSineFunction 添加 z 参数
public static float SineFunction(float x, float z, float t)
{
    return Mathf.Sin(Mathf.PI * (x + t));
}

public static float MultiSineFunction(float x, float z, float t)
{
    float y = Mathf.Sin(Mathf.PI * (x + t));
    y += Mathf.Sin(2f * Mathf.PI * (x + 2f * t)) / 2f;
    y *= 2f / 3f;
    return y;
}
最后在 Update 函数中调用的地方将 z 值传进去。
position.y = f(position.x, position.z, t);
到目前为止,我们只是先把 z 参数加上,还没有在函数中使用,接下来我们继续。
2.2 创建网格点
在此之前,我们创建的只是点,只有 x 轴和 y 轴的相互作用。现在,我们要来创建面,也就是向 z 轴扩展。
首先要修改点的数量,在 Awake 中我们 new 了一个 Transform 数组,用于存放每一个点的 Transform,之前数量是由 resolution 决定的,现在需要改为下面的代码
points = new Transform[resolution * resolution];
接下来还要修改创建点的代码,还是 Awake 函数中,完整的 Awake 函数代码如下
void Awake()
{
    float step = 2f / resolution;
    Vector3 scale = Vector3.one * step;
    Vector3 position;
    position.y = 0f;
    position.z = 0f;
    points = new Transform[resolution * resolution];

    int i = 0;
    for (int z = 0; z < resolution; ++z)
    {
        position.z = (z + 0.5f) * step - 1f;
        for (int x = 0; x < resolution; ++x)
        {
            Transform point = Instantiate(pointPrefab);
            position.x = (x + 0.5f) * step - 1f;
            point.localPosition = position;
            point.localScale = scale;
            point.SetParent(transform, false);
            points[i] = point;
            i += 1;
        }
    }
}
稍微解释一下,其实最后的结果就是原来只有一条曲线的基础上,我们复制了整条曲线,然后往 z 轴方向偏移,这样就形成了一个面。
这里有一个要注意的地方就是 resolution 的值,如果设置的太大,可能会导致卡,如果设置为 100,按上面的代码,resolution * resolution,最终是创建了 10000 个 GameObject。
运行后效果如下
2.3 将 z 轴值加入运算
因为 Mathf.PI 在很多地方都会用到,所以我们把这个变量值抽出来,修改代码如下
const float pi = Mathf.PI;

public static float SineFunction(float x, float z, float t)
{
    return Mathf.Sin(pi * (x + t));
}

public static float MultiSineFunction(float x, float z, float t)
{
    float y = Mathf.Sin(pi * (x + t));
    y += Mathf.Sin(2f * pi * (x + 2f * t)) / 2f;
    y *= 2f / 3f;
    return y;
}
现在,来添加第三个函数,Sine2DFunction,在这个函数中让 z 值也参与运算。
要展现的公式是: $f(x,z,t) = sin(π(x + z + t))$
记得要改三个地方
// 添加新函数
public static float Sine2DFunction(float x, float z, float t)
{
    return Mathf.Sin(pi * (x + z + t));
}
// 将新函数加入到函数委托数组中
static GraphFunction[] functions =
{
    SineFunction, MultiSineFunction, Sine2DFunction,
};
// 将函数名添加到枚举中
public enum GraphFunctionName
{
    Sine,
    MultiSine,
    Sine2D,
}
运行效果如下,现在我们已经在3维的世界了,hhhhh~
2.4 更有趣的效果
接下来我们看两个更有趣的效果,第一个是合并两个 Sine 函数
$$f(x,z,t) = \frac{sin(π(x + t)) + sin(π(z + t))}{2}$$
修改 Sine2DFunction 函数的代码如下
public static float Sine2DFunction(float x, float z, float t)
{
    float y = Mathf.Sin(pi * (x + t));
    y += Mathf.Sin(pi * (z + t));
    y *= 0.5f; // 把y轴的结果值限制在[-1,1]之间
    return y;
}
运行效果如下
接下来是第二个效果,我们创建一个新的效果函数 MultiSine2DFunction。
这个函数要表现的效果,是由一个主波动,和两个次级波动组成。两个次级波动,一个基于 x 值,另一个基于 z 值。也就是 $f(x,z,t)=M+S_x+S_z$。
为了让主波动慢一点,所以我们使用的公式是 $M=sin(π(x+z+\frac{t}{2}))$。而 $S_x$ 是一个正常的波动,所以公式为 $S_x = sin(π(x + t))$。$S_z$ 波动的需要更快一些 $S_z = sin(2π(z + 2t))$。
为了使主波动更大,我们会让 $M$ 乘 4,而 $S_z$ 的速度是 $S_x$ 的两倍,所以我们需要将它最后的结果除2,使其振幅变为原来的1/2。最后使用的公式是 $f(x,z,t) = 4M + S_x + \frac{S_z}{2}$。为了将最后的 y 值限制在 [-1, 1]之间,还需要最终结果除以 5.5。
综合起来,最后的代码如下
public static float MultiSine2DFunction(float x, float z, float t)
{
    float y = 4f * Mathf.Sin(pi * x + z + t * 0.5f);
    y += Mathf.Sin(pi * (x + t));
    y += Mathf.Sin(2f * pi * (z + 2f * t)) * 0.5f;
    y *= 1f / 5.5f;
    return y;
}
不要忘记将函数添加到委托数组和枚举中
static GraphFunction[] functions =
{
    SineFunction,
    MultiSineFunction,
    Sine2DFunction,
    MultiSine2DFunction,
};
public enum GraphFunctionName
{
    Sine,
    MultiSine,
    Sine2D,
    MultiSine2D,
}
最后,来看运行效果
目前的完整代码如下
// GraphFunction.cs
using UnityEngine;

public delegate float GraphFunction(float x, float z, float t);
// GraphFunctionName.cs
public enum GraphFunctionName
{
    Sine,
    MultiSine,
    Sine2D,
    MultiSine2D,
}
// Graph.cs
using UnityEngine;

public class Graph : MonoBehaviour
{
    public Transform pointPrefab;

    [Range(10, 100)]
    public int resolution = 10;

    public GraphFunctionName function;

    Transform[] points;

    static GraphFunction[] functions =
    {
        SineFunction,
        MultiSineFunction,
        Sine2DFunction,
        MultiSine2DFunction,
    };

    void Awake()
    {
        float step = 2f / resolution;
        Vector3 scale = Vector3.one * step;
        Vector3 position;
        position.y = 0f;
        position.z = 0f;
        points = new Transform[resolution * resolution];

        int i = 0;
        for (int z = 0; z < resolution; ++z)
        {
            position.z = (z + 0.5f) * step - 1f;
            for (int x = 0; x < resolution; ++x)
            {
                Transform point = Instantiate(pointPrefab);
                position.x = (x + 0.5f) * step - 1f;
                point.localPosition = position;
                point.localScale = scale;
                point.SetParent(transform, false);
                points[i] = point;
                i += 1;
            }
        }
    }

    void Update()
    {
        float t = Time.time;
        GraphFunction f = functions[(int)function];

        for (int i = 0; i < points.Length; i++)
        {
            Transform point = points[i];
            Vector3 position = point.localPosition;
            position.y = f(position.x, position.z, t);
            point.localPosition = position;
        }
    }

    const float pi = Mathf.PI;

    public static float SineFunction(float x, float z, float t)
    {
        return Mathf.Sin(pi * (x + t));
    }

    public static float MultiSineFunction(float x, float z, float t)
    {
        float y = Mathf.Sin(pi * (x + t));
        y += Mathf.Sin(2f * pi * (x + 2f * t)) / 2f;
        y *= 2f / 3f;
        return y;
    }

    public static float Sine2DFunction(float x, float z, float t)
    {
        float y = Mathf.Sin(pi * (x + t));
        y += Mathf.Sin(pi * (z + t));
        y *= 0.5f;
        return y;
    }

    public static float MultiSine2DFunction(float x, float z, float t)
    {
        float y = 4f * Mathf.Sin(pi * x + z + t * 0.5f);
        y += Mathf.Sin(pi * (x + t));
        y += Mathf.Sin(2f * pi * (z + 2f * t)) * 0.5f;
        y *= 1f / 5.5f;
        return y;
    }
}
到此,使用 Unity 实现漂亮的数学曲面 的第一部分内容就结束了,下一部分将从这里开始接着书写更复杂有趣的效果,敬请期待~
原文翻译自 mathematical-surfaces